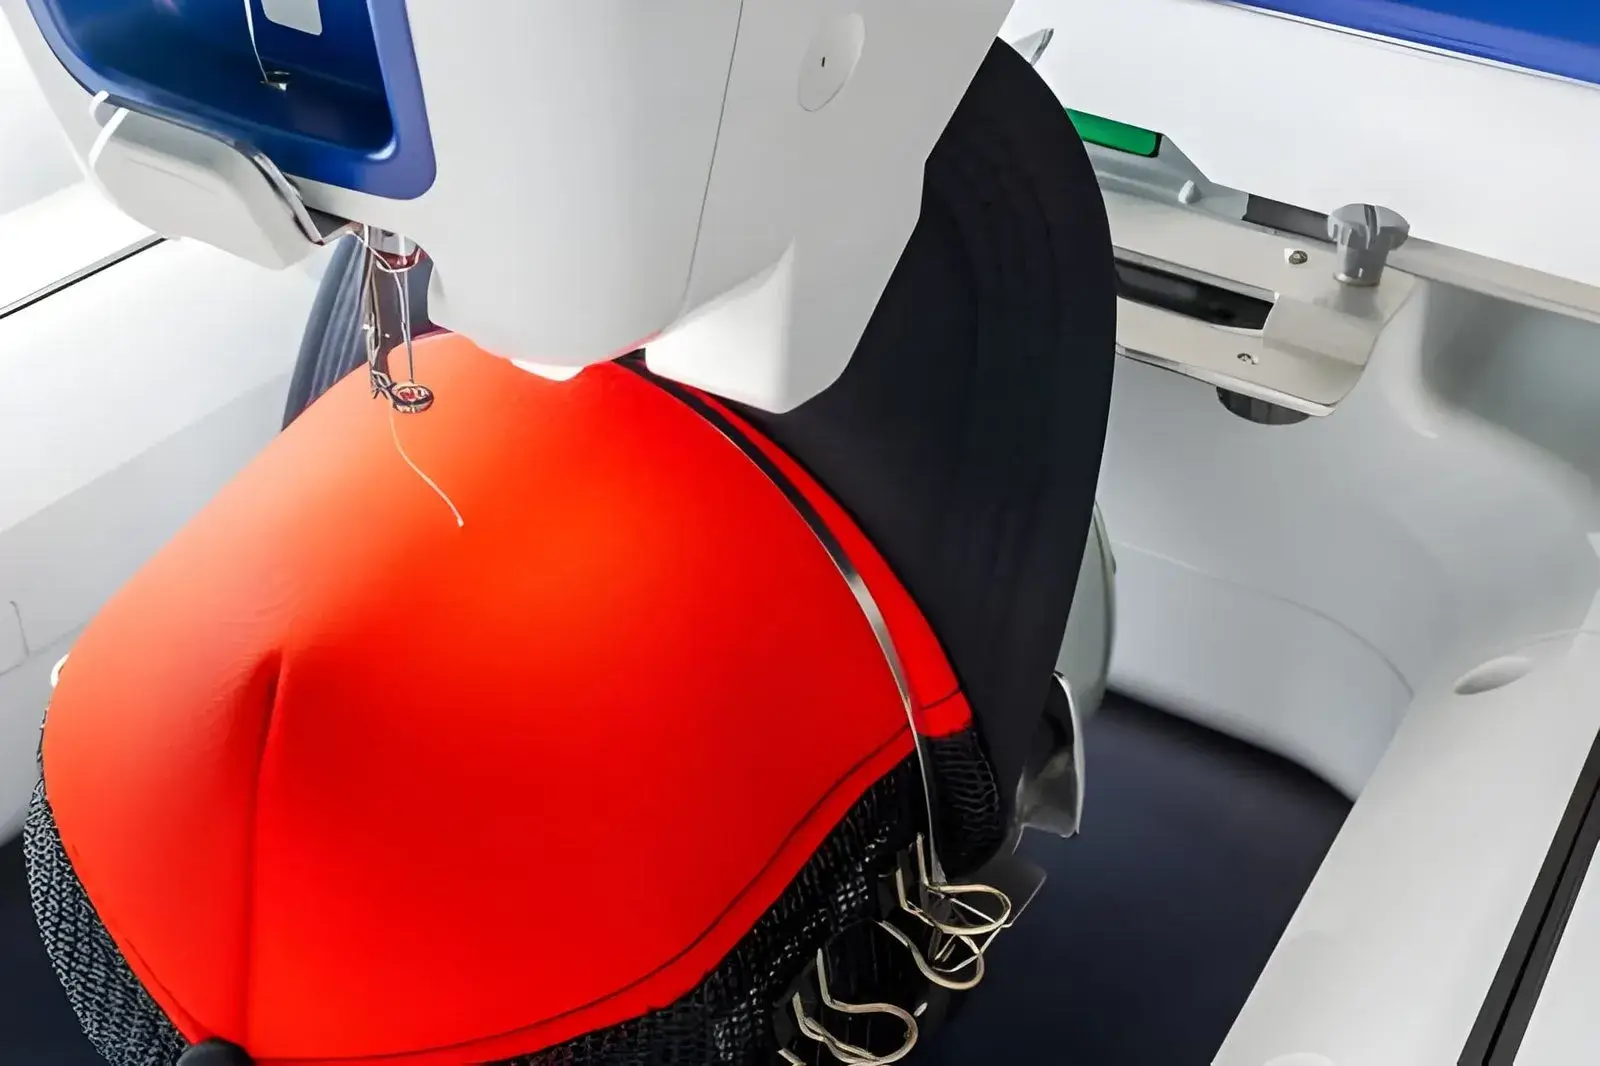
If you’ve ever taken a flat garment digitizing file and tried to run it on a cap — you already know what happens. Puckering. Registration errors. Stitches running off the centre panel. Cap embroidery is one of the most technically demanding areas of our craft, and it requires a digitizing file specifically built for a curved, structured surface.
In this guide, we’ll cover exactly what makes cap digitizing different, the most common errors, and what you should look for in a cap-specific digitizing file.
What Makes Cap Embroidery Different?
Caps present a set of challenges that flat garments simply don’t have:
- Curved surface: The front panel of a cap curves both horizontally and vertically. Stitches that run parallel to the brim will travel across a curved plane, causing registration drift if not compensated.
- Structured foam: Most structured caps have a foam front panel. The needle must punch through foam and fabric, which changes the tension dynamics significantly.
- Limited hoop movement: Cap frames move differently from flat hoops. The rotational axis means the machine handles long designs differently — wider designs need extra care at the edges.
- Direction of sewing: Caps are typically sewn from the centre outward to prevent fabric bunching. A flat-garment file that starts at the top and works downward will cause problems on a cap.
Cap Digitizing Best Practices
- Always Sew from Centre Out
The stitch sequence must radiate from the centre of the design outward. This pushes any excess fabric toward the edges of the panel rather than bunching it in the middle.
- Use Shorter Stitch Lengths
Longer stitches that work well on flat fabric tend to float on the foam of a structured cap. Shorter maximum stitch lengths (3–4mm rather than 5–7mm) sit flatter and reduce the risk of loose stitches.
- Reduce Density Slightly
The foam + fabric combination on a structured cap is denser than a standard woven shirt. Reducing stitch density slightly prevents the design from becoming stiff and prevents needle deflection.
- Adjust Pull Compensation for the Curve
The curvature means vertical and horizontal pull compensation values should differ. A professional digitizer sets these individually per element rather than applying a blanket value.
- Keep the Design Width in Check
As a general rule, cap designs should be no wider than 220–240mm for front panels. Designs that push past this width will start to distort at the edges due to the rotation of the cap frame.
Best Design Styles for Cap Embroidery
Not all design types translate well to caps. These work best:
- Bold logo marks and wordmarks with clean outlines
- Flat colour designs without fine gradients
- 3D Puff designs (the foam gives structure that helps puff stitches stand out beautifully)
- Simple text with thick, readable letterforms above 8mm height
Designs that tend to cause problems: fine detail, photo-realistic portraits, very thin outlines under 1mm, and designs with large open fill areas.
Tell Your Digitizer It’s a Cap
This might sound obvious, but many customers submit orders without specifying the garment. A cap digitizing file is fundamentally different from a shirt file — the stitch direction, density, sequence, and compensation are all different. Always specify: (a) it’s a cap, (b) the cap type (structured, unstructured, 5-panel, trucker), and (c) whether it’s 3D puff or flat embroidery.
Summary
Cap digitizing is a specialised skill, but when done correctly the results are outstanding. The structured, three-dimensional look of a well-embroidered cap is one of the most impactful forms of brand presentation available. Our team digitizes caps daily — and every file is tested against real cap frames before delivery.